Hanging drywall in your mobile home

To redo a wall, hang drywall on top of the existing paneling. If you are covering smoke damage, take special precautions. Here are some tips:
If you need to replace the ceiling, do that before you begin working on the walls. See our article on replacing ceiling panels for more information.
Drywall is sold in large sheets, in several lengths and thicknesses. Use the thinner 1/4 inch drywall for covering an existing wall. The longer the sheets of drywall, the fewer joints you will have to cover. Be sure you can get them into your home without damaging the sheets.
Use screws to fasten the drywall instead of nails. They hold better and can be removed without damaging the drywall, if you make a mistake.
Consider renting or buying an electric screw gun. They have magnetized tips that hold the screw and they sink the screws to the proper depth.
Place drywall sheets horizontally on the wall. Hang upper panels first. Don't make joints at the corners of doors or windows. This increases the potential for cracks to develop. Instead, bridge openings with a drywall sheet and cut out with a saw.
For maximum strength, stagger the joints. Vertical seams on upper panels should not meet those on lower panels.
Steps to hanging drywall
Step 1: Before You Begin
Remove molding, baseboards, batten strips, outlet covers and wall switches.
Step 2: Measure & Cut
With a chalk line or straightedge, mark cut line. Score deeply with a utility knife. Stand the sheet on edge and snap the cut segment back. Slice the backing with knife.
Step 3: Hang Panel
Start at the corner. Place first wall panel tightly against ceiling. If panel edge doesn't center on wall stud, trim it back until it does.
Step 4: Fasten Panel
Use 1-5/8 inch screws to secure to stud. Drive screws 3/8 inch minimum from edge of panel. Place screws minimum of 12 inches apart along the stud. Set screws just below the surface of the drywall, but don't break the paper facing.
Step 5: Fit Upper Panels
Keep joints snug. Avoid making joints at doors and windows. Place a sheet across opening and cut out with a saw.
Step 6: Cut Around Outlets
Measure from edge of box to edge of last panel. Measure from the floor to the top and bottom of the box. Cut out with saw.
Step 7: Fit Lower Panels
Place panel in position. For a tight fit, use wooden wedge to lift lower panel firmly against upper. Screw to wall studs.
Finishing the drywall
To smooth the surface for painting or wallpapering, the joints and fasteners need to be hidden.
There are three types of joints: tapered (factory-indented), non-tapered (edges you cut yourself) and inside corners. The first coat is applied differently for each joint, as well as for covering drywall screw indentations.
Non-tapered Joint
Apply thin bed (1/16 inch) of compound (mud). Press tape into mud and cover with another thick layer of compound.
Tapered Joint
- Step A: With 6-inch taping knife held at a 45 degree angle, fill tapered joint with compound.
- Step B: Center tape over joint. Press into mud coat. Cover with smooth, thin layer of mud. Allow to dry.
Inside Corner
Apply compound. Fold tape down the center and press into corner. Cover each side with thin layer of mud.
Screw indentations
Cover screw heads with compound, passing over indentations several times to fill depressions. Scrape away any excess.
Fix-it-tips!
A quick wipe with a damp sponge will smooth out any knife marks after joint compound has begun to set up.
Finishing steps
Step 1: Second Coat
Be sure the first coat is dry. Apply compound with a 12-inch taping knife. Feather the edges. On non-tapered joints, spread feathering out 10 to 12 inches to minimize the seam.
On inside corners, do one side, let compound dry, then do second side, or use a corner knife.
Cover screw heads with second coat. Feather the edges.
Step 2: Third Coat
Thin compound with water. Apply a light coating over all mudded areas. Let dry.
Step 3: Sand
Put a dust mask over your nose and mouth. Sand lightly to smooth mudded surface.
Removing smoke odor from walls and ceilings
If your walls retain smoke odor from fire damage, do not remove wall panels. This will only spread the odor. Wash the walls with household cleaner. Let dry. Seal the walls with a pigmented shellac found at home centers and paint stores (e.g., Kilz, Bins or XTM). Cover the walls with drywall, wallpaper or paint. For ceilings, scrape off texturing compound, then wash and seal.
Materials you will need:
- ¼ inch drywall sheets
- 1 5/8 inch drywall screws
- Wooden wedge
- Joint compound
- Drywall tape
- Fine-grit sandpaper
Tools you will need:
- Measuring tape
- Chalk line
- Straightedge
- Utility knife
- Electric screw gun
- Keyhole saw
- 6-inch taping knife
- 12-inch mud knife
- 4-inch corner knife (optional)
- Dust mask
Related articles
You may also like
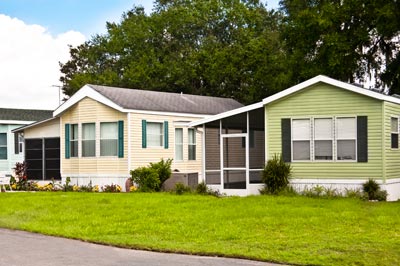
Mobile home siding cleaning
Regular maintenance will keep your mobile home siding looking new and last longer. Use our quick tips to keep your siding looking good.
What's lurking below your mobile home?
Do you remember when you were young and had to check under your bed for monsters before you could go to sleep? I sure do!
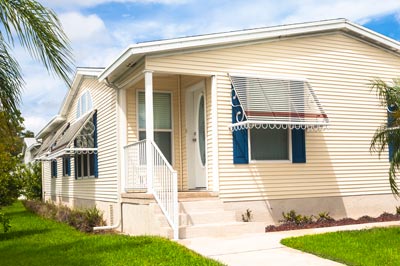
Do it yourself mobile home awning
Get quick tips on how to install a new awning, carport, or sunroof to your mobile home from Foremost Insurance.